
Packaging keeps the world organized. Whether it’s a packet for your M&Ms, a hamper for your dirty laundry or the bottle that holds the delicious liquid particles of your beer together, the things we put things in are important!
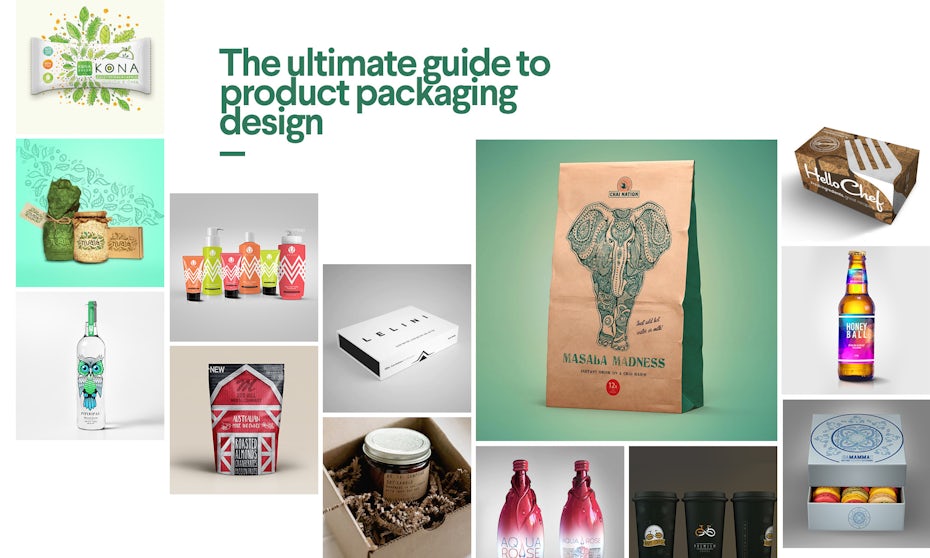
So what is product packaging? Product packaging design refers to the creation of the exterior of a product. That includes choices in material and form as well as graphics, colors and fonts that are used on wrapping, a box, a can, a bottle or any kind of container.
It’s a practical tool, yes. (I mean, how else are you going to effectively get beer into your mouth?) But it’s also more than that. Like any good design, packaging tells a story. It’s also a sensual experience, literally engaging us through sight, touch and sound (and possibly smell and taste, depending on the product/package). All of these details help us understand what the enclosed product is for, how it should be used, who should use it and, maybe most importantly, if we should buy a product or not.
In the Ultimate Guide to Product Packaging Design we look at how to get your packaging to tell the story you want.
Contents:
We’ve just sent you your free packaging design ebook.
- Before you start your packaging design
- The packaging design process in 7 steps
- Packaging design terms you should know (glossary)
- 99designs recommends
Before you start your packaging design
—
3 crucial questions
There are three questions you must have the answer to before you start designing the packaging for a product:
- What is the product?
- Who’s buying the product?
- How are people buying the product?
Let’s look at these a little bit more in depth:

1. What is the product?
Not a trick question; this should be an easy one. What are you selling? How big is it? What materials is it made of? Is it delicate?
This question is going to help you determine if there are any logistical musts for your product packaging. For example, a delicate product will require more secure packaging. Something that is large or with odd dimensions, on the other hand, may require a custom packaging solution instead of an out-of-the-box box.
2. Who’s buying the product?
Is the product supposed to be used by men, women or both? Is it for children or adults? Is it geared towards people who are environmentally conscious? To those on a budget or with lots of disposable income?
A product’s packaging should appeal to its ideal consumer; it’s important to know who that consumer is before you start the design process. Products for older adults may need larger text. Alternatively, items geared towards an affluent customer will need to consider materials that create a feeling of luxury.
3. How are people buying the product?
Are they purchasing it in a supermarket? A small boutique? Online?
You’re going to want to think about packaging differently if the product is going to be sold online and shipped than if it’s going to need to stand out from the competition on a big-box store shelf. Items that will be sold online probably shouldn’t have a lot of extra space that could cause the product to rattle around, or the package to bend. And those that will be on a boutique shelf will need to catch the eye of a buyer surrounded by cutesy items in cutesy packages.
—
Got your answers? Good. These will guide you in making all of the other (many) decisions that you’ll have to make in the packaging design process.
Still pondering these questions? You’re probably not ready to start the packaging design process just yet. That’s okay! It’s better to take your time and get it right than jump in too soon.
Information you need to collect
Brand requirements
Sometimes a product is stand alone, and in other cases it’s representing an established brand. If your packaging needs to represent a certain brand aesthetic, make sure you’ve gathered the following information before you start:
- Colors
If you already have the CMYK values or Pantone Matching Values (PMS) colors include those as they’re specifically for printing. (If not, a hex code is fine, too.) - Fonts
Make sure you have the proper fonts and any specific usage instructions (like kerning or weight). - Logo
If you need to put a logo on the package, make sure you have a vector file available.

Content that needs to go on the packaging
What this is is going to be pretty unique to your specific product, but you’ll want to make sure you have it all sorted out before you start design. Note that depending on your industry, there may be some things you’re required to put on your packaging for legal reasons.
You may need:
- Written copy
This can include anything from the name of your product to a description to words enticing someone to purchase. - Imagery
Want to put photos on your packaging? You’ll need to have those ready to go before you start the design process. - Required marks
Depending on your product / industry, you may be required to include a barcode, nutrition information, association marks, etc. - Know what temporary content you need
Some products—like foods or cosmetics—have additional information that needs to be put on different batches of products (expiration dates or batch numbers). You probably don’t want to print this directly onto your packaging as it will be changing regularly, but you’ll want to make sure you save space for a sticker or stamp to be placed at a later date with that information.
Style likes and dislikes
It’s a good idea to have done some style research before you start the design process. Start collecting packaging that you like. Snap photos when you’re at the store. Create a Pinterest board.
Remember, style inspiration isn’t always a one-to-one transaction. Maybe you love the color of a specific shirt, or the print of your aunt’s curtains, or the font on a sandwich shop sign. One thing to remember, though, is that you’re not necessarily curating design ideas for yourself, but for that ideal customer. You may love shabby, vintage chic, but if you’re selling baby motorcycle jackets to badass biker moms, that’s probably not the best style for your packaging.
Another thing to start thinking about when you’re starting your style journey is materials. You don’t have to make any decisions right now, but you’ll want to start noticing the different options.
Budget
Packaging design budgets break down into two categories:
- One-time costs
- Per-item costs
One-time costs include things like paying for the original design work, purchasing a stamp (if you’re going the DIY route), print plate setup (for large, offset print runs.) You pay for these up front, and usually only once (unless you change your design).
Per-item costs are generally for materials and labor. Each box will cost a certain amount, as will the tissue paper you stuff it with and the tape you use to seal it. And you either have to pay someone to put your product into the box, or do it yourself.
You’ll want to have a ballpark idea of how much you’d like to spend before you start the design process. Keep in mind that cheaper isn’t always better; paying a little bit more for your materials could up your presentation (and your selling price) by making you stand out from the competition.
The packaging design process in 7 steps
—
Once you’ve gathered all of this information, it’s finally time for the fun part: the design process! Remember how you want your packaging design to tell a story? The choices you make in the design process are what’s going to help you tell that story.
1. Understand packaging layers
There are three “layers” of product packaging: outer packaging, inner packaging and product packaging. Your product may need one or all three of these.
Outer packaging is the first thing a customer is going to see. It’s what protects your product from the elements. This could include the box that the product is shipped in or the shopping bag the item is placed in at the store.

Inner packaging is what keeps your product nestled safely in the outer packaging. This might be packing peanuts or tissue paper that stops something from getting jostled or scuffed. Or it might be a sealed bag that acts to preserve freshness.
Product packaging is what most people think of when they think of packaging: it’s the box the toy comes in, the bottle with a label, the tag on a garment, the wrapper of a candy bar.
Each one of these layers of packaging gives you a chance to tell a part of your story.
2. Choose the right type of packaging
There are many different types of packaging available for your product:

Cup design by exsenz for gracian.ani
Choosing between a box and a bottle may sometimes be a no-brainer. But sometimes it’s not. Here are a couple of things you need to think about when selecting the right type of packaging for your product:
- The product
Everything always comes back to this! If you are selling something liquid, that’s going to limit your options. (Though don’t let this stifle your creativity! Look at Capri Sun: they turned the juice-box industry on its head by creating a juice-sachet. Or Go-Gurt, which took yogurt from a spoon-required snack to one you could suck out of a packet.)

- The competition
Does everyone else put their soup in a can? You’re going to want to think really hard about putting your soup in something else. On one hand, it will make you stand out, which could help set you apart. On the other, consumers are used to cans of soups, and grocery stores are setup to stock cans in their soup section, which may mean your box of soup is fighting an uphill battle. - The budget
You may have an awesome idea on how you’re going to sell your astrology charms in a star-shaped box. But if your budget is $0.50 per piece, that’s probably not going to be possible. Remember to always keep the ideal customer in mind: if your charms are going to sell for $12 each, a simple, inexpensive box is probably your best bet. But if they’re hand-crafted, gold keepsakes that you are selling for $100, you may be better served to up your budget and go for that luxury star-shaped box.
3. Line up your printer
Printing is not something you’re going to do until after the design is complete. But you should think about it way before you get to that stage! Not only is connecting with a printer going to ensure you’re solid on the costs of printing, but they’ll be able to give you specific information that can help your designer prepare files.
A couple things you’ll want to ask about:

- Dielines
If you’re going with a standard-sized box or label, printers should be able to provide dieline templates that can be shared with a designer. - File-format requirements
Your printer will need a vector file. Does it need to be a layered file? Should you include cut-lines or not? Your designer should supply a print-ready file (usually an Adobe Illustrator (.ai), Photoshop (.psd), PDF or EPS). You may not be able to open these files if you don’t have the right software, but your printer will be able to. The designer will also supply visual mockups in a PNG or JPG format (which everyone can open). Make sure you understand which file types are what so you can supply them to the right people. - Color options
Some printers are going to be able to color-match to any Pantone color. Others (especially less-expensive options) are going to have a limited color palette for you to work with. - Digital vs. offset printing
Which type does your printer use? If they do offset, what is the minimum order number? How do the costs scale?
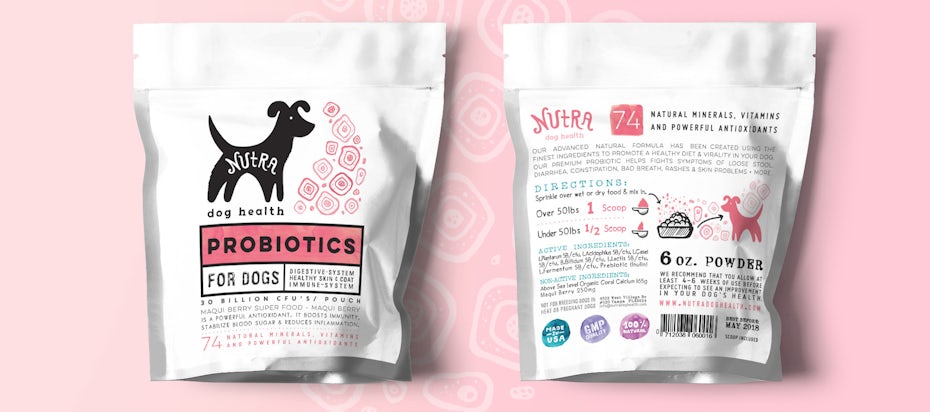
4. Create your information architecture
Think back to those 3 questions, specifically who’s buying your product and where are they finding it. You’re going to use that to create the information architecture for your package.
You may have beautiful photos of your product in action, a brilliant testimonial from a customer, a witty tagline that explains how you’re awesome, and a great graphic showing customers how to use your product. But when a shopper looks at your packaging they’re probably only going to remember one thing. What do you want that to be?
Pick the one absolute most important thing you want customers to know about your product. That should be the centerpiece of your design.
You can then add 2-3 things you want to show once they’ve picked up your product (or clicked on your link) that will close the deal. Let’s look at an examples:
5. Evaluate a packaging design
You’ve got some great design ideas! Now it’s time to give some feedback. Here are a few things you’re going to want to think about:
- Is it clear what your product is?
When you look at the package, is it clear what the product does and who it’s for? Buyers are only going to spend money on things they understand.
Make sure your packaging doesn’t look like something else (unless it’s very intentional). You definitely don’t want to confuse your consumer.
- Is the packaging an honest representation of your product
One of the worst things you can do is misrepresent your product in your packaging. Make sure any photos on the packaging are actually photos of the product. Of course you can and should put your best face forward, but if you show a picture of muffins filled with raisins and there’s actually only 1 raisin in each of your muffins, a customer is going to feel cheated (and probably won’t buy from you again).

- What will this package look like in 3D?
A good designer should provide a mockup of your design both print-ready (flat) and in 3-dimensions. You can also create your own mock-ups by printing something out on white paper and constructing it into a box or tube. This will help you notice things you wouldn’t otherwise. Sometimes an image will look great when flat, but terrible when constructed (or vice versa). Make sure you understand the difference. - What will this package look like in stores?
Shelf-impact is very important for products that are sold in-stores. You’ll want to consider:
- How much of the packaging will be visible? When products are lined up next to each other, you can usually only see one-face. Make sure your most-important info is front and center.
- What will it look like when these products are stacked next to and on top of each other? Is there a pattern that’s created? Do you want there to be?
- What will this look like compared to the competition? Go to one or more stores where your product will be sold and figure out where your product would be placed. Are most products one color? How will you make yours stand out and get noticed?

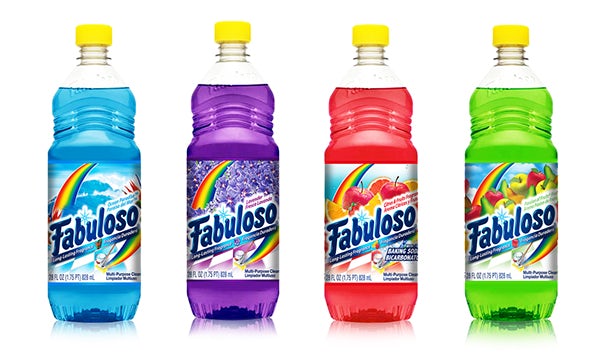
- Is this design versatile?
You may only have one flavor of Aunt Miranda’s Famous Hot Sauce at the moment, but in the future you might want to create Aunt Kelsey’s Infamous Buffalo Sauce and Aunt Sasha’s Secret Caesar Dip. Is your design going to be easily modified to accommodate new variations of your product?

- Is your packaging reusable?
This may not be important for every product, but you may want to consider if your packaging can be reused (and if you want it to be)! For example, can your bag be repurposed into a grocery tote? Free marketing! If you sell gardening gloves, can your box be reconfigured into a planter? That’s clever and functional!
6. Collect feedback
We’ve just sent you your free packaging design ebook.
Before you 100% decide on your packaging design, make sure to run it by both key stakeholders and people who have never heard of or used your product.
Even if it’s just your neighbor across the street, people not closely associated with your product will notice things you never did. Consider asking them:
- What does this product do?
- Who is supposed to buy this product?
- What is the one key message you get when you look at this packaging?
Their answers to these questions will help you determine if the packaging is communicating what you want it to. If it’s not, go back to your designer and figure out what you can change.
7. Get the right files from your designer
You’ve decided on your packaging design. High five!
Now go back to that information you got from your printer and check to make sure you have the right files. You probably need:
- Packaging dielines in vector format. This will probably be an Adobe Illustrator (.ai), .pdf, or .eps file. You will need one for each variation of your packaging you are creating. (So, if you have 3 flavors, you need 3 dielines.)
- Color codes. If your printer does custom colors, make sure you have the Pantone or CMYK color codes so that everything turns out looking like you want.
Packaging design glossary
—
Whatzzat mean? Here’s a quick guide to some common packaging design terms:
Adobe Illustrator (AI) file — Adobe Illustrator is a design program used to create vector images (which you will need for printing). Files created in this program have a .ai extension. You will need Adobe Illustrator to open these files. (If you don’t have it, that’s okay! Your printer will.)
Barcodes (UPC and EAN) — Barcodes are those groups of lines on any package. They have machine-readable data on them that stores information about the product, including price. There are several different types of barcodes, including UPC (Universal Product Code)—the predominant barcode in North America—and the EAN (International Article Number (it was originally “European,” hence the E)—a global barcode. You may wish to apply for these before you get your packaging designed.
Bleed — In printing, you use a bleed when your design goes to the edge of your paper (or box, or wrapper). In this case, designers will actually add a little extra design to the edges (the “bleed”) so that when the design is printed and cut to the right size there’s some room for error if the cuts are a few millimeters off.
Canister — A round or cylindrical container, typically made of metal, and used for storing things like food and chemicals.
CMYK — Stands for cyan (blue), magenta (red), yellow and key (black). These are the four colors used in printing. Each color has a CYMK code that a printer will use to help color match between your design and the finished package.
Dielines —The flattened pattern of your product packaging. Designers and printers use them to create the proper layout for a package.
EPS — Stands for encapsulated postscript. This is a file extension for vector-based images. They can generally only be opened in specialized graphic design programs.
Digital printing — A modern printing method wherein information about the file is sent to a printer digitally and each piece of packaging is run individually through that printer. Digital printing is great for small-runs and short turn around times. Often times, the more traditional offset printing is more affordable for larger print runs.
Offset printing — A printing technique wherein plates of your design are created in four colors (CMYK). These plates are then run through a large, industrial printer. Offset printing has high setup costs (i.e. the plates need to be created), but in large volumes (usually over 1,000 or so pieces) it is more economical.
Pantone — Pantone is a company that created the Pantone Matching System (PMS). The PMS is a catalogue of standardized printing colors. Each color has an assigned number and can be reproduced nearly identically by any printer.
PDF — Stands for portable document format. It’s a versatile file format that be either a vector or raster (you want vector for packaging!) and supports both images and text. PDFs can be opened on nearly any computer.
Raster file type — Raster images are made up of thousands of tiny dots (pixels). As such, they are difficult to resize.
RGB — Stands for red, green and blue, the three primary colors (that can be combined to create all other colors) in light, and therefore on digital screens. RGB or hex codes are used to identify colors in digital spaces; they can be converted into CMYK and Pantone color codes for printing.
Vector file type — Vector images are made up of lines. As such, they are easy to resize.
99designs recommends
—
Ready to get started on your product packaging? Here are some great companies we have worked with and highly recommend.
For getting your packaging designed:
- 99designs. (I mean, we’re allowed a little bit of a self callout here, right?)
For boxes, mailers and cartons:
For tags, wrappers and boxes:
For labels or stickers: